

Whether you’re fostering a puppy until she can find the right home or you just want to give your dog a room of her own, building a cardboard doghouse is a meaningful way to mark National Puppy Day. This is a fun family project—just make sure to supervise the little ones when cutting cardboard or using a hot glue gun. Ready to build your puppy palace? Here’s how.

Supplies
- 1 cardboard box large enough for your dog to comfortably turn around in
- 1 cardboard box slightly larger than main doghouse box
- Scissors*
- Utility knife* (optional)
- Ruler
- Pencil
- Hot glue gun*
- Paintbrush
- Nontoxic paint for outer walls of house (any color)
- Nontoxic black paint, or other color for roof
- House decor (optional)
Instructions
- Use scissors or a utility knife to slice off the bottom flaps of the smaller cardboard box. This will form the “house.” On one (or both) of the short sides of the house, cut a door large enough for your dog to walk through. You can also cut out windows at the height of your dog’s head.
- Slice off the two long flaps on the top of the box.
- On the remaining top flaps, use a ruler and pencil to mark the center point of each flap. Draw a line from that center point to both of the outer corners. Use scissors or a utility knife to cut each flap into a point, forming a gable. Reserve the cardboard scraps for the next step.
- Reinforce the gables: Use a hot glue gun to affix the cardboard scraps from the previous step to the inside of the box. Glue the scraps across the seams between the top of the house and the gables to give them strength to hold the roof.
- Use the paint and paintbrush to coat the house with paint. Allow to dry thoroughly.
- Flatten the larger cardboard box so the longer sides are on the outer edges of the flattened surface. Use scissors or a utility knife to cut the box along the flattened seams. You will have two pieces of cardboard. One of these will be the base of the “roof,” and the other will be made into “shingles.”
- Drape one piece of cardboard over the house. The roof should overhang the main house structure on all sides, just enough to look like the eaves of a roof. Trim to fit if necessary.
- Cut the piece of cardboard that will form the shingles to the same length as the roof. The shingles cardboard should be a few inches wider than the roof. If it’s not, trim a few inches from the width of the roof.
- Paint both pieces of cardboard black, or whichever color you’re using for the roof. Allow to dry thoroughly.
- Use hot glue to secure the roof to the frame of the house.
- Cut the “shingles” piece of cardboard lengthwise into eight or 10 strips of roughly equal width.
- Working from the bottom of one side of the roof, use hot glue to affix one strip lengthwise. Allow the strip to overhang the edge of the roof an inch or so, leaving the bottom of the strip hanging freely.
- Use hot glue to affix another strip parallel to the first, allowing the bottom of the second strip to slightly overlap the top of the first strip.
- Repeat until half of the strips are affixed and one panel of the roof is covered in strips.
- Repeat on the other side of the roof.
- Turn the strips into shingles: Starting at the bottom of one strip, use scissors to make vertical cuts going up toward the strip above, without cutting all the way through. Repeat on all strips to form layered shingles.
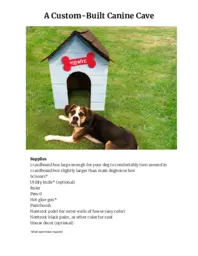
- Decorate the house however you’d like—we cut out a cardboard “bone” with our puppy’s name on it and used hot glue to affix it to the front of the house. Happy housewarming, Howie!
*Adult supervision required.
If you're looking for more holiday activities, take a look at these free printables to help celebrate all year long.


